
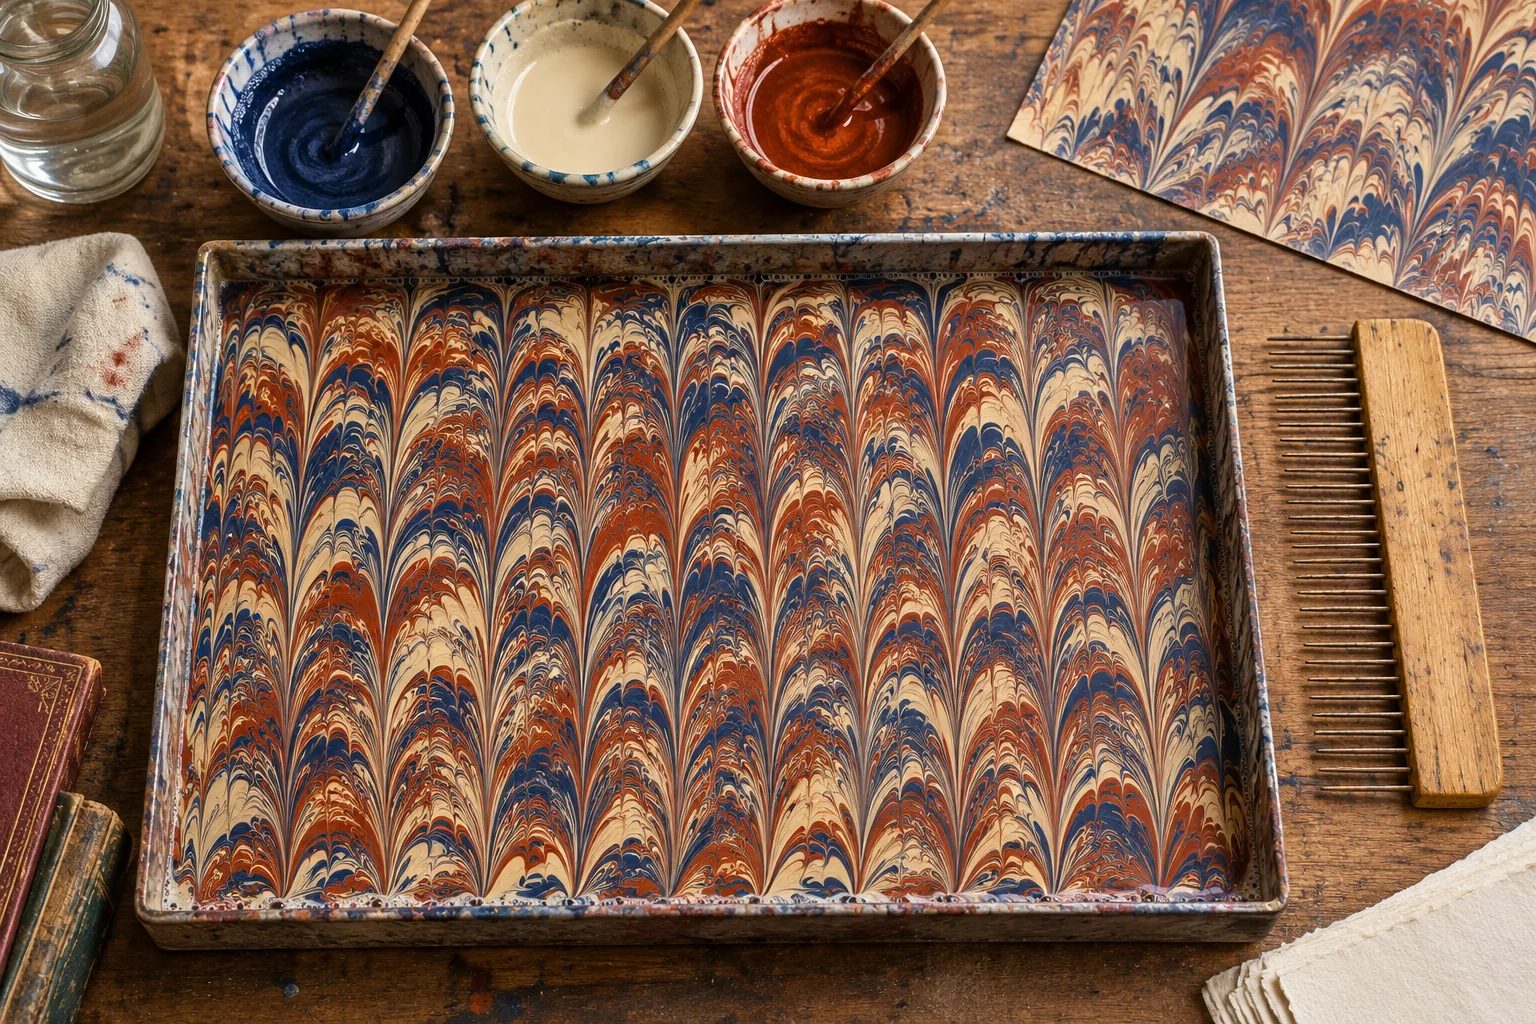
Open an old book and a field of tiny red, cream and blue feathers may stretch from the inside cover to the first leaf. At the centre of every feather, the colours take much the same turn. Drawing those bends one at a time with a brush would be an extraordinary exercise in patience. A paper marbler can make a whole row in one stroke because the colour is still floating when the pattern is drawn.[1, 3]
In a common form of paper marbling, a maker drops prepared colours onto a thickened liquid bath, draws a tool through the floating patches and lays paper gently against the surface. The colour transfers in a single contact. All the sweeping and combing has already happened before the paper enters the picture. A marbled sheet preserves where the colours ended up after a brief series of movements in a tray.[1, 2]
How can the colour stay on top?
A drop of ordinary colouring stirred into a glass of water will spread through the glass. In a marbling tray the maker needs a different result. The colour has to spread sideways, remain near the surface and respond to a passing tool. Bookbinders call the prepared bath the size. Traditional recipes have used plant gums or a thickener derived from carrageen. Its resistance to motion gives the maker time and control as the design develops.[1, 2]
A study of the fluid mechanics of marbling distinguishes three places where materials meet, the paint against air, the bath against air and the paint against the bath. The tensions at those interfaces help determine whether a newly placed drop stays at the surface and how far it opens. In the researchers’ setup, even paint a little denser than the bath could remain on top. Floating here involves more than a simple comparison of two densities.[1]
Now imagine a single red patch spreading over a tray that already carries blue. Its outer edge has to push some of the blue aside. Add another drop inside the red patch and the red may become a ring. The history of the earlier drops can survive as narrow bands around later ones. A small adjustment to the spreading of one colour can therefore alter several neighbours, even if the maker never touches those neighbours with a brush.
How one stroke produces a hundred matching bends
Picture a row of cream spots on blue and pull the tip of a fine stylus across their middles. The surface immediately beside the tip follows it most strongly. Colour a little farther away moves less. What began as a round spot acquires a trailing point, and a straight boundary bends into a curve. The tip leaves a record of the path it travelled, although it never carried cream or blue paint of its own.[1]
A comb repeats the movement at the spacing of its teeth. Every tooth draws a local strip of the floating pattern along with it. Parallel teeth can pull similar curves out of patches that began at different places. A second pass across the first can turn long bands into nested arcs. The Oxford collection at Lady Margaret Hall shows how relatively simple spot patterns form the starting point for more elaborate combed families, including nonpareil and peacock designs.[3]
One way to read a combed sheet is to follow a boundary instead of a colour. Find a narrow cream band that runs into a bend. Trace that band back as far as possible. Often its neighbours make the same turn with it. Then look for several bends whose tips lie the same distance apart. That spacing suggests the action of a many-toothed tool. It rarely tells you the exact first arrangement of the colours, because different starting patches can yield similar small details.
The order of the strokes matters as much as their directions. On an imaginary tray, pull three straight bands to the right, then draw one line vertically across them. The final vertical stroke bends the displaced bands. Reverse those two operations and the three horizontal strokes act on the already bent vertical feature. A still sheet can preserve that difference after the tools and tray have been put away.
Why the bath avoids turning brown
A tool can stretch a colour boundary a very long way without completely blending the materials across it. When the fluid resists motion strongly enough and the tool moves gently, the paint largely follows the stroke. Thin ribbons of several colours remain individually visible. Compare them from close up and from the other side of a room. At a distance the eye may combine ribbons that are still physically separate.[1]
This balance is visible in the difference between bold spot designs and tightly combed ones. On a broad patch the edge shape is obvious, even if it wobbles a little. A delicate line has much less room for disturbance. A comb that lifts a wake or a sheet that slides sideways during transfer can blur several narrow bands in one place. Precision depends on how the tool enters and leaves the bath as well as where it goes while immersed.
The moment the paper touches
Once the pattern is ready, the sheet meets the bath across a gradually advancing line of contact. An air pocket keeps a patch of paper away from the colour. Sliding paper on the surface shifts a section of the design before it is picked up. In the fluid-mechanics demonstration the researchers prepared paper with alum, transferred the design, rinsed away excess bath and dried the sheet. Different marbling traditions use their own combinations of colour, bath and paper.[1, 2]
There is a simple way to picture the orientation of the print. Draw an imaginary arrow pointing right on the tray. Lay a transparent sheet onto it face down, then lift it and turn it over like a page. Relative to an observer who stayed still, the arrow now faces the other way. The reversal comes from which side you view after turning the sheet. It requires no special trick with the comb.
Why sheets from the same binder can resemble each other
Collections of historical bindings preserve recurring names and families of patterns. Reusing the same comb, palette and sequence of strokes can produce a recognizable style. Yet each pull removes the particular distribution of colour then present on the bath. The maker must supply and arrange colour for the next sheet. Tiny differences in drop placement survive as variations inside the larger repeated design.[3, 4]
Look again at the paper inside a book. The closely spaced feather tips tell you something about the tool. The broad islands of colour preserve something of the first drops. A slightly wandering line that runs through an otherwise regular field may be the clearest sign of all. For an instant, that coloured boundary was a moving liquid, and the paper met it just there.
Keep exploring
Follow colour from historic pigments to a second decorative process that makes an image on paper, the cyanotype.
Sources and further reading
- Sun and colleagues — Hydrodynamics of marbling art
- Roberts and Etherington — Bookbinding and the Conservation of Books, Marbling
- Lady Margaret Hall Library, Oxford — Bookbindings
- University College Dublin Library — Marbled Papers, a Brief History of an Endangered Bookcraft
Keep exploring.
One remarkable idea at a time—nature, science, history and beyond.
Last updated November 19, 2026.

Barnakle Editorial Team
Barnakle Editorial Team is the collective byline used for Barnakle’s editorial articles. The contributor profile explains the team identity and links to the publication’s editorial policies.
More from the editorial team →