
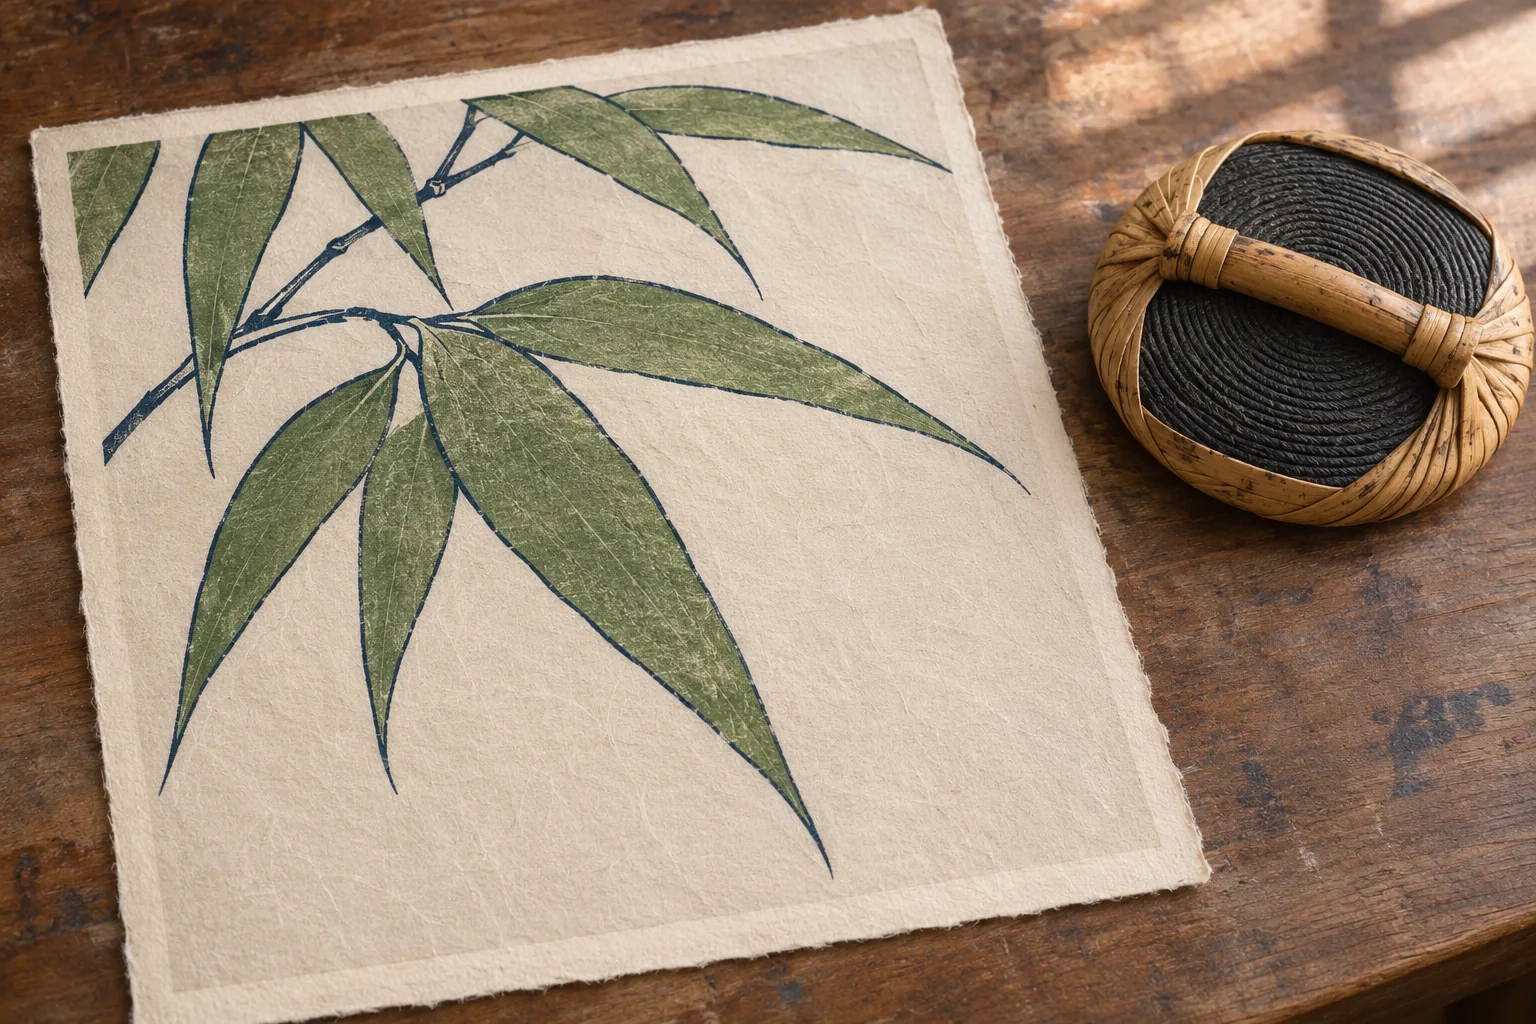
A pale green leaf sits neatly inside a thin black outline on a Japanese woodblock print. There is no overlap at its pointed tip and no white gap along its stem. The green and the outline came from separate pieces of wood. The printer could see neither the leaf nor its outline at the moment of contact because the sheet went onto the block face down. Two shallow cuts outside the picture explain how the colours could meet so precisely.[1, 2]
The guides are called kento. One is an L-shaped corner, the kagi kento. The other is a straight ledge, the hikitsuke kento, located farther along the same edge. Each block for the print has guides corresponding to the same positions on the paper. Set one corner and the adjoining edge against them, lower the sheet, and the image on that block falls into the intended place. Printers call this alignment registration.[1]
Before the paper reaches a colour block
In a traditional multi-block process, the starting design is divided into printable parts. A key block often carries the principal outlines and details. Its raised surfaces receive ink while the cut-away areas leave the sheet clear. A proof pulled from the key block provides a common drawing from which to prepare the areas for other colours. Each carved surface is a separate answer to the question of which parts of the sheet should take colour on this pass.[2, 3]
Suppose the picture contains two leaves and a narrow branch. The key block gives them dark outlines. On one colour block, the carver leaves raised shapes where the leaf interiors should be and cuts away surrounding wood. On another, a raised strip might supply a different tone to the branch. A green patch on its own could look almost meaningless. Its shape makes sense in relation to the lines already planned for the sheet.
It helps to distinguish drawing the separations from placing the paper. If the carver puts one leaf too far to the right on its block, the printer can seat the paper perfectly and still get a leaf in the wrong place. Conversely, exact carving cannot rescue a sheet that slides between impressions. Using proofs from a common key and using the kento at the press solve two different alignment problems.[1, 3]
Why a corner and an edge work together
Lay a postcard on a table and put a fingertip over one corner. You can still swing the far end through a sizeable arc while keeping the corner in place. Now set that corner against an L-shaped guide and bring a second point along the long edge against a straight stop. The second contact defines the direction that the edge has to follow. Two sheets of the same dimensions can be put down with remarkably similar positions by these simple references.
Distance between the guides matters. A tiny rotation around the corner produces a small displacement near the pivot and a larger one at the far side of the paper. Imagine an edge that has turned through just one degree. At a distance of twenty centimetres from the pivot, that represents roughly three and a half millimetres of sideways travel. A narrow unprinted gap that wide beside a black outline would be hard to miss.
Musashino Art University describes seating the lower right corner against the L-mark and bringing the lower edge against the straight mark to its left. The printer holds the references in place while lowering the rest of the paper. Because the guides are outside the intended picture, they can locate a sheet even if it has received only one faint colour or none at all. The same marks work for the first impression and the last.[1]
What happens while the sheet is face down
Pigment goes onto the parts of the block that stand proud. Once the registered paper is down, the printer rubs its back with a disk-shaped pad called a baren. Pressure brings the front of the paper into contact with the coloured relief. The paper is lifted, and the printed area is now visible in its orientation on the finished sheet. A historical account of the method describes working with dampened paper and locating it against the cut guides before printing.[4]
Consider the inked block and the impression side by side. A leaf pointing left on the block will point right after the paper is lifted and turned over like a page. Every colour block must share the same relationship to the final image. Flipping one tracing at the wrong stage would create a reversed element that no amount of shifting at the printing table could align. A set of proofs lets the maker see the relationship in the orientation the reader will see.[3, 4]
The useful unit to count is the impression. A sheet may be pressed against several carved surfaces, or receive more than one pass to build a particular effect. Separate areas on one block can sometimes carry different colours if the printer can apply them independently. Looking at a finished image and counting visible hues does not, by itself, give an inventory of the pieces of wood used to make it.[2, 3]
Reading a gap in an old print
Suppose every green shape on a sheet sits a millimetre above its outline. That common offset would make the placement of the sheet or the registration of the green block worth examining. If one leaf misses while its neighbours all line up, the error is more local. Look for a misplaced carved boundary, a wrinkle or a patch that received uneven contact. A single irregular edge can suggest several causes. A repeated pattern of offsets helps narrow the possibilities.
Damp paper adds a further complication. Its dimensions can change with moisture, so two impressions made under different conditions can agree near the corner but diverge farther away. A uniform sideways shift, a slight turn and a change of scale each leave a different pattern. Inspect the near and far margins as well as the most conspicuous edge. Woodblock practitioners describe choosing and preparing proof paper with dimensional stability in mind precisely because a small change can propagate into the colour blocks.[3, 4]
What the guides leave to the printer
Accurate registration gives the printer room to vary other things. In a graded passage of colour, known as bokashi, the tone can soften across a single area while its outside boundary still falls exactly where the design requires. Historical impressions from the same blocks can differ in their treatment. The notches settle where the paper goes. Decisions about gradation, pressure and colour remain visible in the result.[2]
When looking at a print, follow one long contour until you reach an abrupt change of colour. Then find the most distant place where that same colour meets another line. The printer had to bring both points into register in a single placement of the sheet. The small guides that made that possible may be outside the trimmed picture, but their effect is still there at both ends of the line.
Keep exploring
Explore the materials behind historic colours and compare a second way of making an image on paper.
Sources and further reading
- Musashino Art University — Kagi Kento and Hikitsuke Kento
- RISD Museum — Process and Function, Traditional Japanese Printmaking Technique
- Encyclopedia of Woodblock Printmaking — Making Colour Separations
- Tools and Materials Illustrating the Japanese Method of Colour-Printing — Printing
Keep exploring.
One remarkable idea at a time—nature, science, history and beyond.
Last updated November 19, 2026.

Barnakle Editorial Team
Barnakle Editorial Team is the collective byline used for Barnakle’s editorial articles. The contributor profile explains the team identity and links to the publication’s editorial policies.
More from the editorial team →